Agile teams have long been using Jira to help manage their projects. This popular project management tool can be used for issue tracking, bug tracking, and agile project management. With its intuitive interface and powerful features, it’s no wonder why so many teams use Jira every day.
In this article, we’ll explain how to create a project in Jira step-by-step. We’ll also provide some best practices for managing your projects with Jira and the best tools you can use alongside it. Let’s get started!

How to Create a Project in Jira
Creating and managing a project in Jira is easy and reasonably intuitive. Here’s how you would do it.
(Optional) Step 1: Have the Right Authorization
If you are using Jira on a company-managed account, you will need the “Administer Jira” permission to create a new project. Under the Administer Jira permission schemes, there is a “Create Team-managed Projects” permission. The system administrator must enable it for your account before you can create a new project for your team.
If you are using Jira from a personal account, you can skip this step and go ahead to the next one.
Step 2: Create a Project
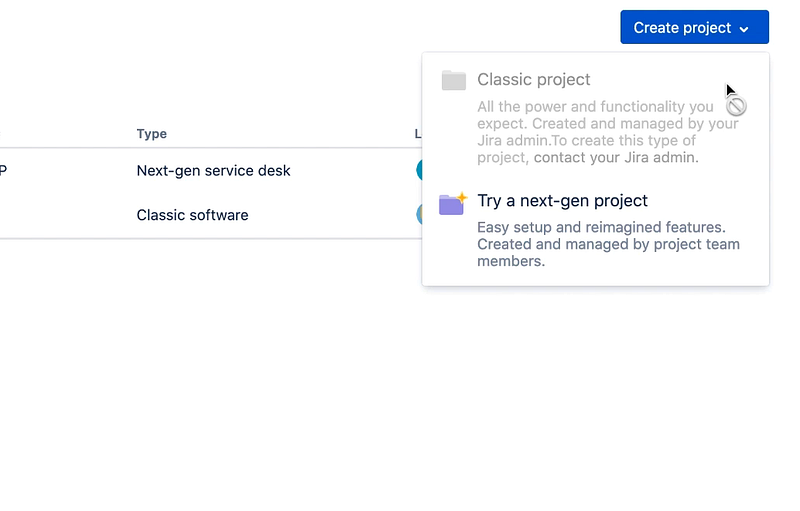
The next step is to create a project. To do this, click on the “Create” button in the upper right corner of your Jira screen. This will open a window where you can enter all the necessary information for your new project.
In your Jira dashboard, you will find two project creation options – a classic project and a next-gen project. A classic project is suitable for most use cases, while a next-gen project is best suited for teams that need fewer customization options and plan to work on one project at a time.
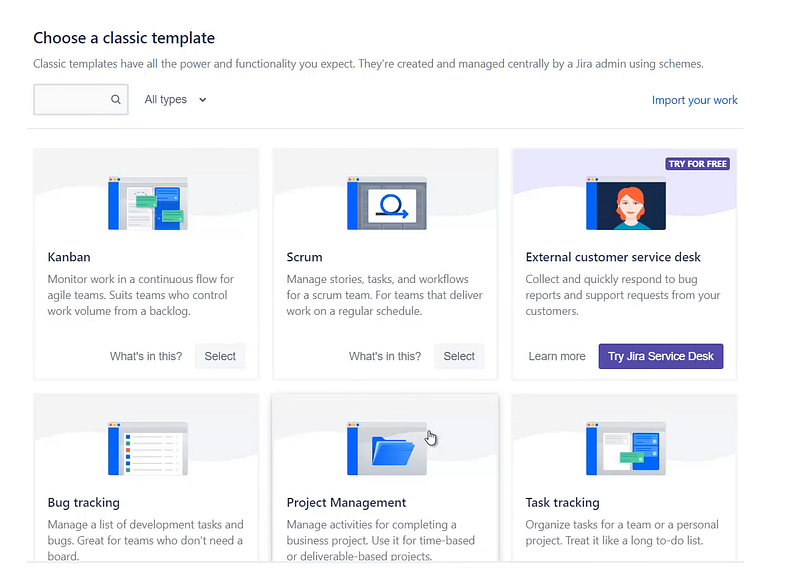
The next screen will let you choose a project template, such as software development, service desk, business process automation, and more. You can also create a custom template if you need to.
Step 3: Enter Project Details
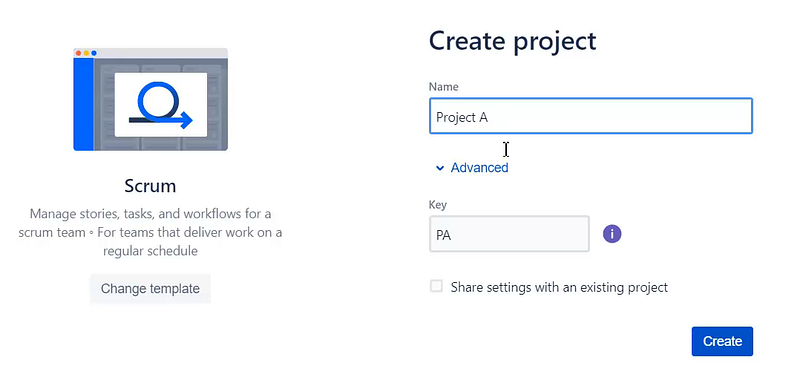
Once you’ve chosen which type of project to create, you will need to fill in the necessary details. This includes a project name, description, and key. The default project template will remain selected automatically, but you can also choose from other templates if needed.
Step 4: Configure Your Project
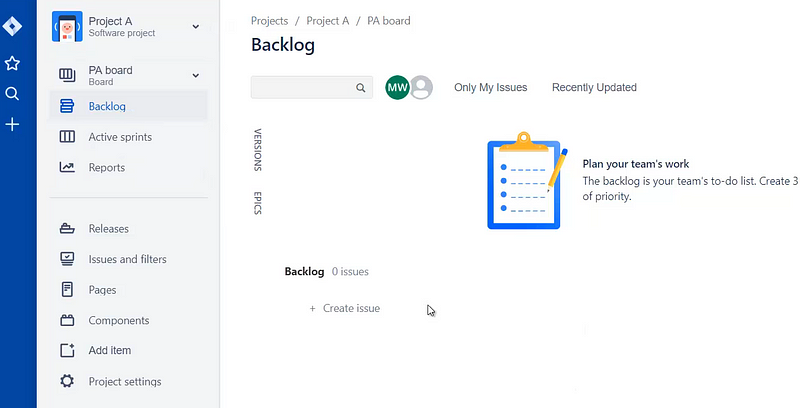
Now, you will need to configure your project. This includes setting up the workflow, custom fields, and project roles. You can also configure Jira integrations and notifications here. You can also add tasks and add new team members to the project. Using a scrum template on Jira, which is common for software project planning, you can also configure your sprints and backlog.
Step 5: Add User and Define Roles
Finally, as a project manager, you can add users to your project and define their roles. You can assign users as project administrators, members, or watchers. Jira also lets you perform bulk action on user management.
Jira Project Management Best Practices
To get the most out of Jira, it’s essential to adopt a few project management best practices. Here are four key points to remember when managing projects with Jira:
- Establish clear roles and responsibilities for each team member.
- Set up proper workflows that map out the entire process from start to finish.
- Identify the tasks required for completion and break them down into smaller subtasks.
- Assign tasks to the appropriate team members and set due dates for each task.
Best Tools to Use with Jira
Jira is a potent tool, but when combined with other tools and plugins, it becomes even more useful. The Atlassian marketplace offers a wide range of tools that you can use to customize and extend your Jira experience. Here are some of the best ones:
1. Day.io – Best Time Tracking Software for Jira
Day.io is a time tracking software for Jira that helps you track and analyze your team’s progress on projects. It provides users with detailed reports, activity logs, and more.
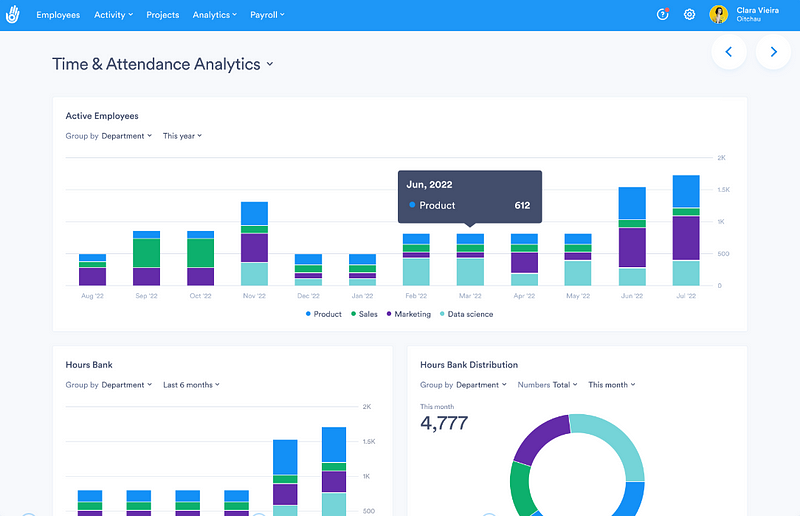
Day.io also lets you prepare precise and detailed time reports and bill clients with automated invoices. The platform integrates with many popular project management tools such as Trello and Asana so that you can see the big picture of your projects in one place.
Features
- Accurate time tracking and timesheet generation
- Comprehensive report creation and management
- Overtime control and approval management for extra hours worked
- Location and biometric authentication for fraud prevention
- Work scheduling and time resource management
- Detailed insights and analytics related to project expense and ongoing progress monitoring
- Time off management with logging for late entry and early exit
- Cross-device compatibility through web and mobile platforms
Pricing
- Project time tracking: Starts from $6 per user/month
- Attendance and time tracking: Starts from $4 per user/month
2. Planyway – Best Resource Planning Tool
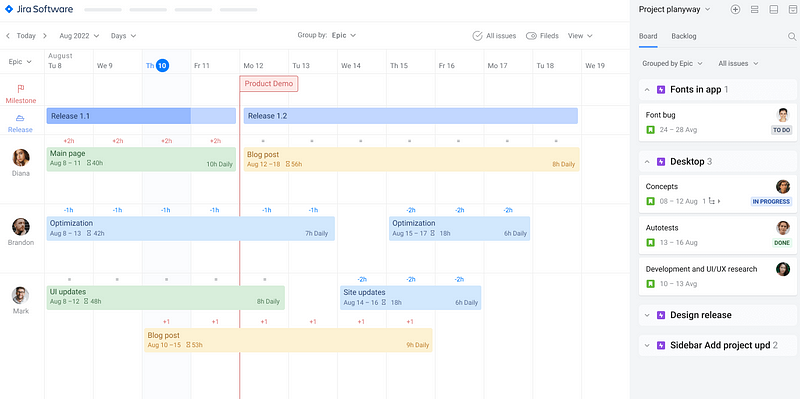
Planyway lets you plan and manage resources across multiple projects. It helps you visualize your project timeline and allocate tasks to team members. Planyway also allows you to track deadlines, set up task dependencies, and review your progress in real-time.
Features
- Smooth integration with Jira capacity planner through task, resource, and project linking
- Day-to-day team management and supervision
- Issue assignment with drag-and-drop interface
- Visual workload management
- Cross-project team collaboration
- Deadline-based resource and priority planning
Pricing
- Cloud: Free for up to 10 users, $3 per user/month for 11-100 users
- Data Center: $300 per year for up to 50 users
3. Structure by Tempo – Best for Project Portfolio Management
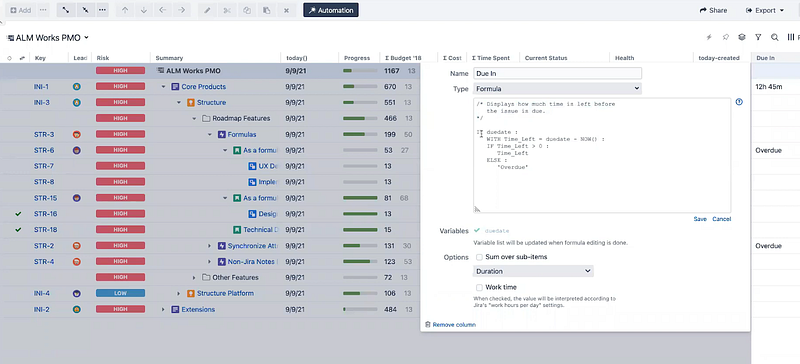
Structure by Tempo is a project portfolio management (PPM) tool for Jira. It helps organizations manage their projects, resources, and costs more efficiently. The platform allows you to track progress on multiple initiatives across teams and departments.
Features
- Multiple team and project management
- Flexible and configurable issue-handling hierarchy
- Real time reporting and insight tools
- Agile project and sprint planning
- Release management for development teams
Pricing
- Cloud: Flat fee of $10 per month for up to 10 users, $2.40 per user/month for 11-100 users
- Server: $10 per year for up to 10 users
- Data Center: $1,265 per year for up to 50 users

Wrap-Up: Create and Manage a Project in Jira
Creating and managing a project in Jira is fast and easy. All you need to do is set up your project, add tasks, invite team members, assign tasks to them and track progress. You can also use plugins to extend the functionality of Jira and make your projects even more efficient.
Connect Day.io with Jira to get the most efficient time tracking and management experience for your Jira projects.
